How to Securely Connect to Your Azure Sql Database?

This post was first published at Medium
The topic of #cybersecurity has been hot recently, especially when it comes to databases where data is stored. This article summarizes some best practices and options related to network security setup for Azure SQL.
Now, let’s start!
First, let’s look at a common use case for Azure SQL.
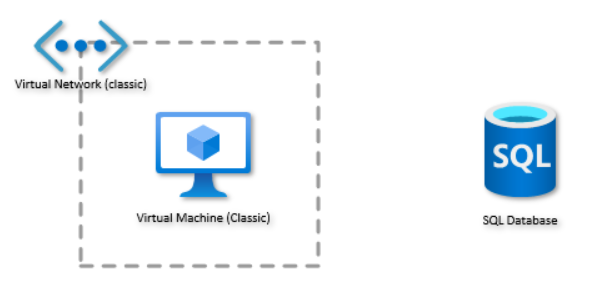
Suppose we have a VM on Azure, in order to be able to connect to Azure SQL Database from this VM, the Azure cloud provides 4 options for us.
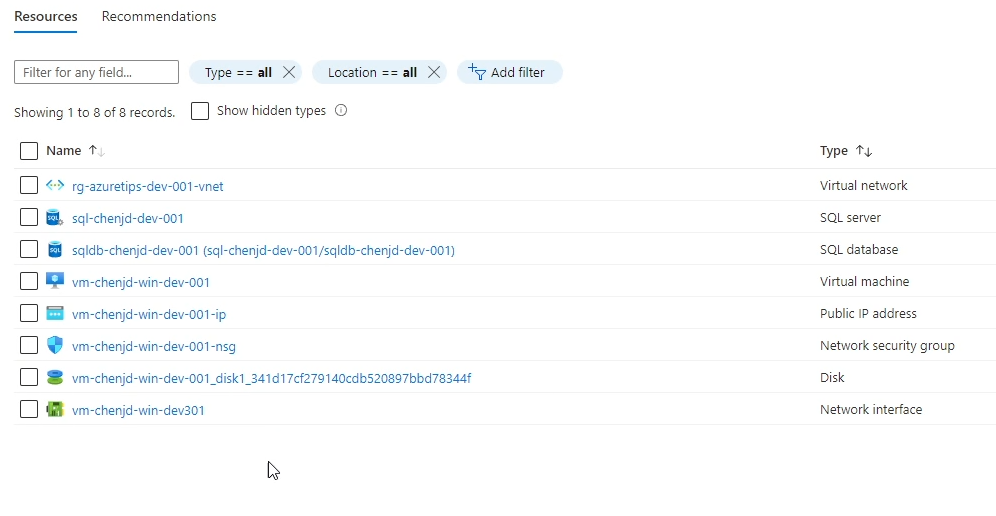
In this case, we set up a SQL server named “sql-chenjd-dev-001” and a VM named “vm-chenjd-dev-001”, as shown in the figure above.
But before we start exploring these options, we should download and install the Microsoft SQL Server Management Studio or SSMS for short in the VM first.
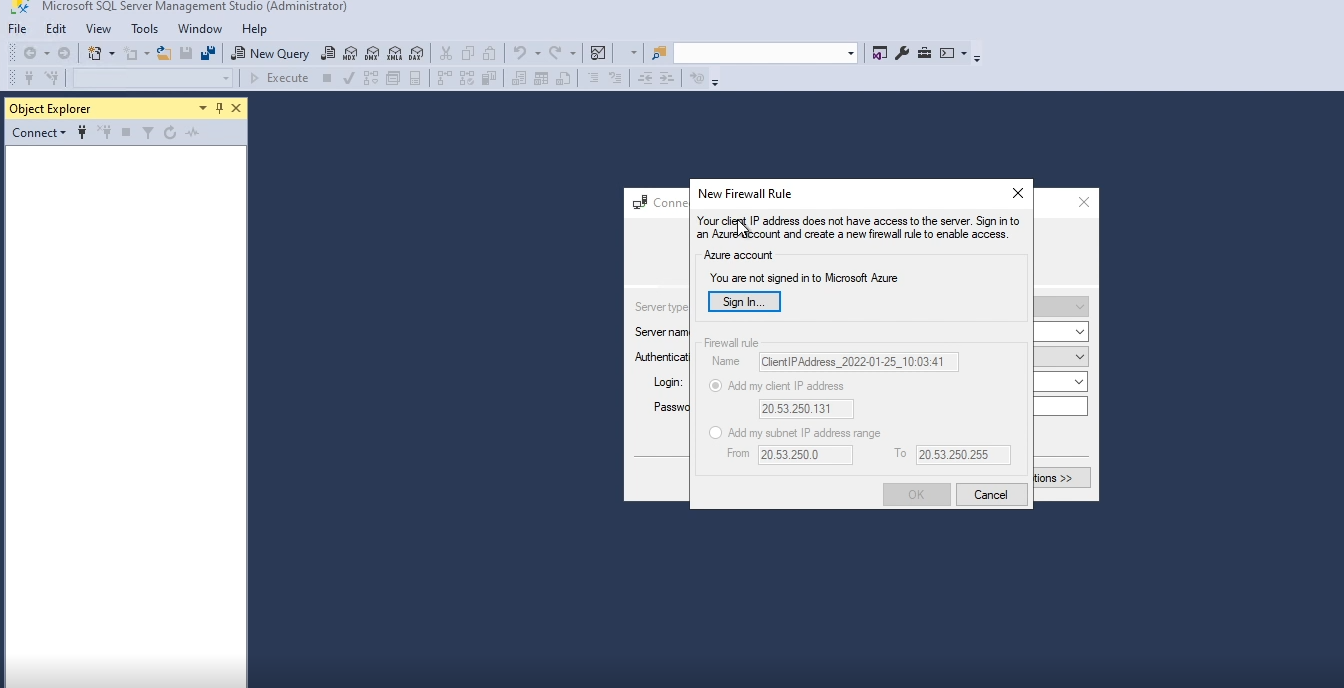
Then try to connect to the SQL server from the VM directly, and as a result you can see that the SQL server is not reachable from this VM at the moment.
Now, let’s get started on how to connect to Azure SQL, and more importantly, how to connect to Azure SQL securely.
Allow Azure services and resources to access this server
The first option is “Allow Azure services and resources to access this server”. You can find this option in the “Firewall and Virtual Networks” panel of SQL Server, as shown below.
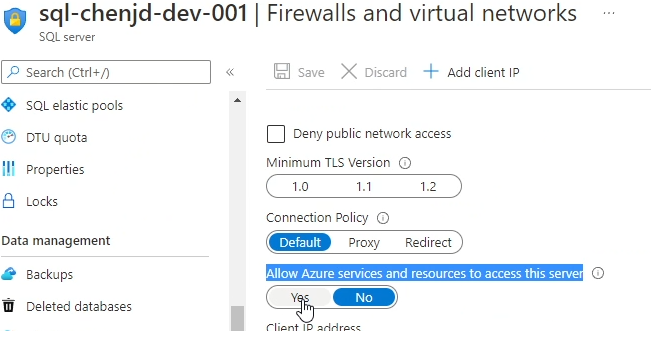
If this setting is enabled, then the SQL server can be accessed from other services in Azure, such as our VM.

However, obviously this is the easiest, but also the least secure way. For example, someone who is not in your organization can access your SQL from the VM he has set up on Azure as long as he knows the SQL account password. Actually, switching “Allow Azure services and resources to access this server” setting to ON creates an inbound firewall rule for IP 0.0.0.0–0.0.0.0 named AllowAllWindowsAzureIps.
https://docs.microsoft.com/en-nz/azure/azure-sql/database/firewall-configure?WT.mc_id=DT-MVP-5001664
Firewall Rules
The second option is to use “Firewall Rules”. We also set firewall rules on the “Firewall and Virtual Networks” panel. As shown below.
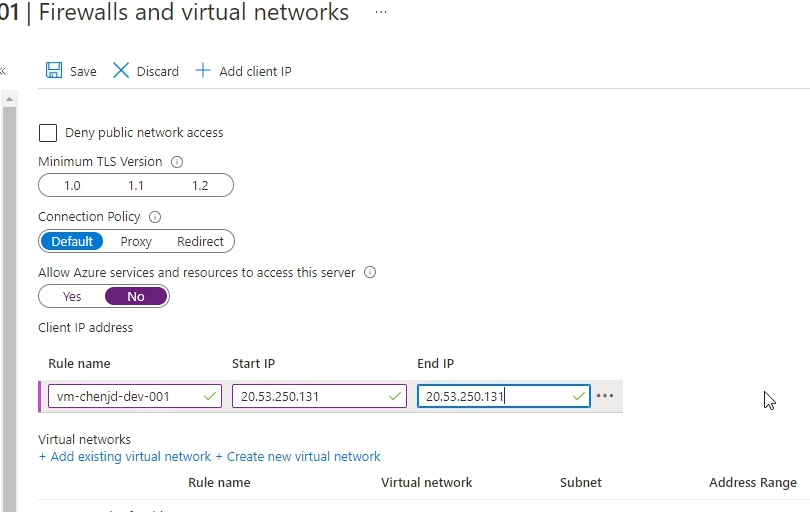
Normally we should disable the “Allow Azure services and resources to access this server” setting and add the IP addresses that are allowed to access the SQL to the firewall rules. It should be noted that we can not only add the IP address of the Azure resource, but also the IP address of the local client.
But this option also has its drawbacks. For example, if the IP address is dynamic, it will obviously cause some inconvenience during use.
https://docs.microsoft.com/en-nz/azure/azure-sql/database/firewall-configure?WT.mc_id=DT-MVP-5001664
Virtual Network Rules
The third option is “Virtual Network Rules”. The Virtual Network rules setting is below the Firewall Rules settings, so you won’t miss it.
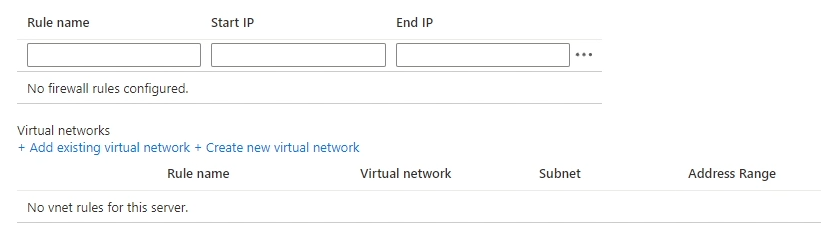
By adding an existing VNET or creating a new VNET for this SQL server, Azure resources within the same VNET can access the SQL server, but VMs not in this VNET cannot access SQL. This option is relatively safer.
Azure Private Link
Setting up “Virtual Network Rules” for Azure SQL is pretty safe, but if you want to make your SQL more secure, for example prevent its IP address from being exposed to the public. Then “Azure Private Link” is the ideal choice.
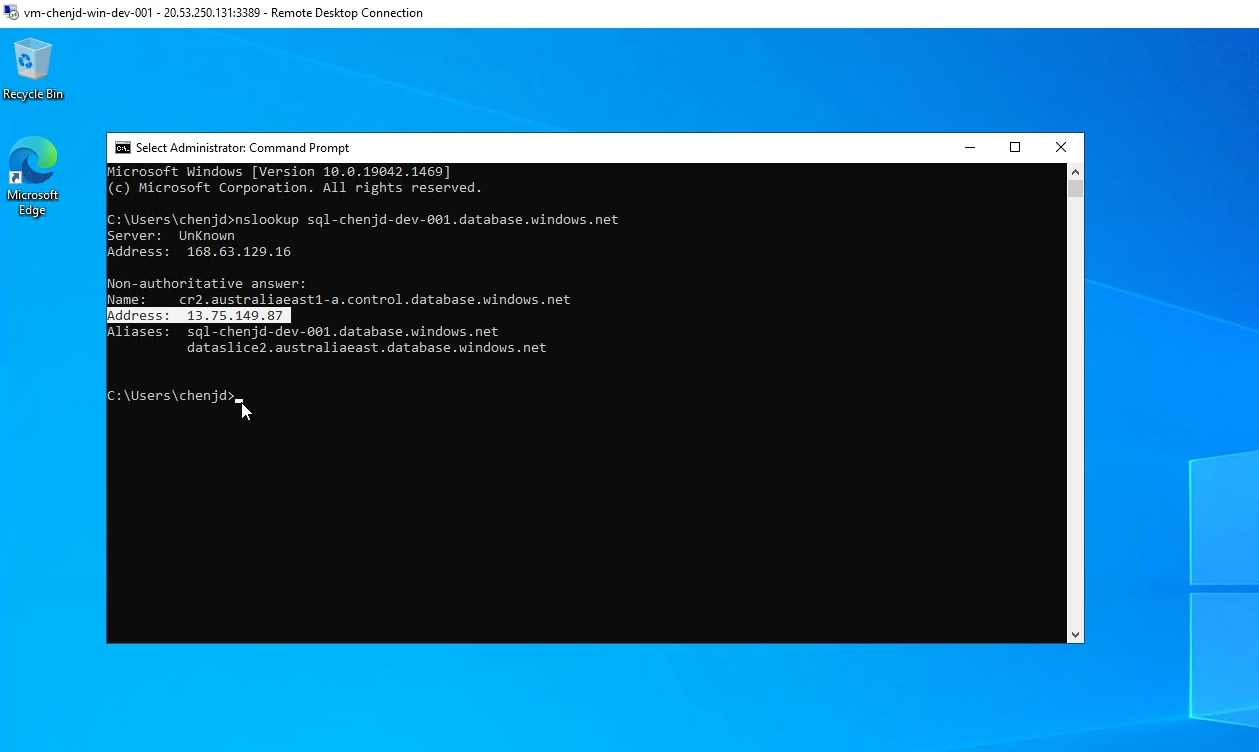
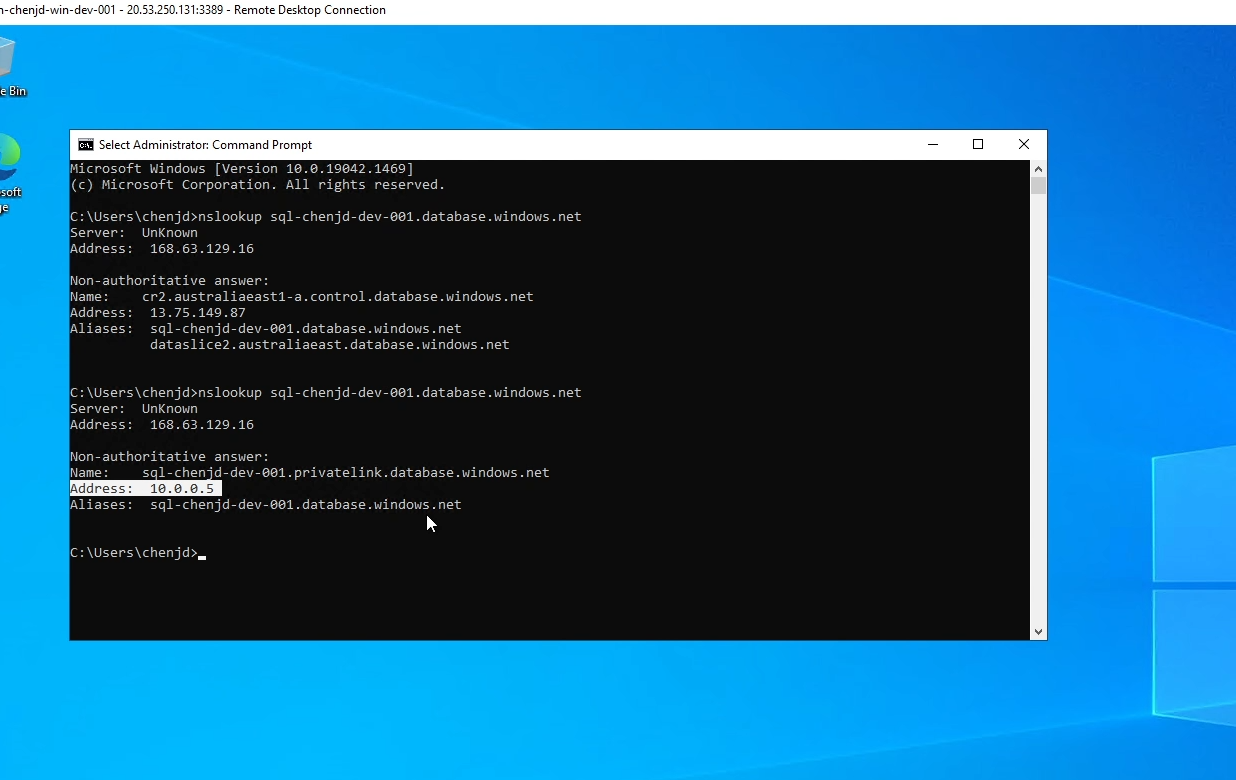
As shown in the image below, if we run the nslookup command on our VM on Azure, we can get the public IP address of the SQL server. Next, we will try to hide its IP address.
Now, let’s start with creating a new Private Link resource on Azure. As you can see in the image below, Private Link not only works with Azure SQL, but also “provides private connectivity between applications deployed in virtual networks and Azure services using the Microsoft network”. So this time we won’t set it on the Azure SQL Server panel.

Click the “Create” button, we will be re-directed to the “Private Link Center” panel. On this page, we should select “Create private endpoint” to create a new private endpoint, which is a network interface that uses a private IP address from your virtual network. This network interface connects you privately and securely to a service powered by Azure Private Link.

I’m assuming you’re already familiar with the “Basics” settings when creating a new Azure resource, so let’s jump right into the “Resource” settings and “Virtual Network” settings for this private endpoint.

In the “Resource” settings, we should provide the resource type and an instance of this resource. Here we provide the “sql-chenjd-dev-001” SQL server.
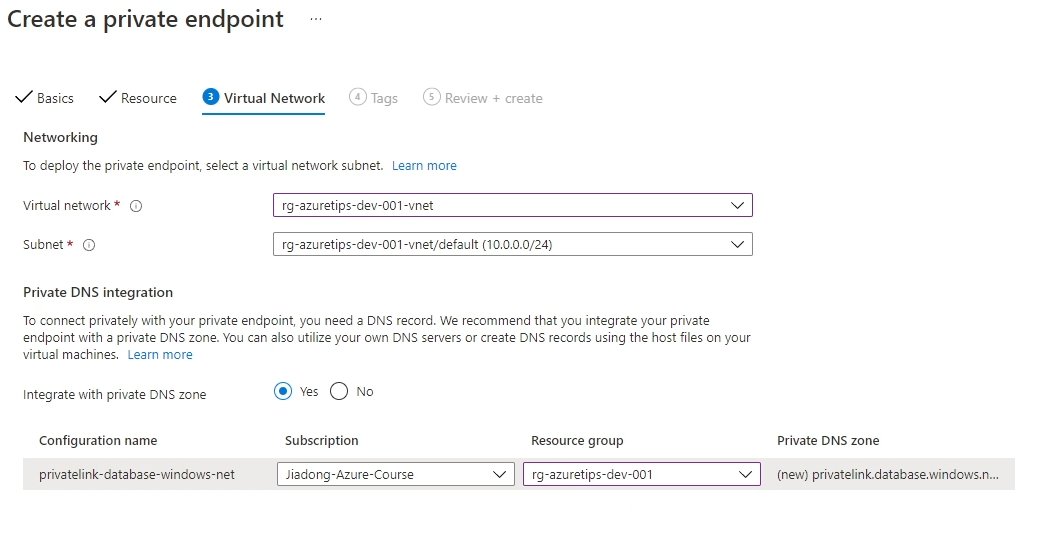
Then in the “Virtual Network” settings panel, we provide the “Virtual network” and the “Subnet” information for this private endpoint.
After waiting for this resource to be created (it will take a few minutes, be patient), we can check on the “Private endpoint connections” panel of the Azure SQL server instance that it has established a private connection to our SQL server.

Now, let’s run the nslookup command on our VM again, this time the IP address is not public, as shown below.
Conclusion
From a security point of view, the Azure Private Link is obviously preferred. But if you cannot create an Azure Private Link resource, remember to turn off the “Allow Azure services and resources to access this server” option, and configure “Firewall Rules” and “Virtual Network Rules” for your Azure SQL server.