Keep Learning Keep Growing - How to Use Azure AI for Chest X Ray Diagnosis
I recently participated in the “MVP Challenge-Azure Data & AI Challenge” organized by Microsoft, which enables participants to learn Azure data and AI technologies and allows Microsoft MVPs from all over the world to compete together and share their learning progress.
The content covers Azure Machine Learning, Azure Cognitive Services(decision, language, speech, vision), Microsoft Bot Framework. To be honest, I’m not new to Azure Cognitive Services, Cognitive Services provides machine learning capabilities to solve general problems such as analyzing text for emotional sentiment or analyzing images to recognize objects or faces. You don’t need special machine learning or data science knowledge to use these services. And I’ll share you how to implement an image classifier for chest X-ray diagnosis with Azure AI and Unity later.
However, Azure Machine Learning is relatively new to me, they are similar but they are different. Both have the end-goal of applying AI to enhance business operations, but the audiences are different: Cognitive Services are for developers without machine-learning experience and Azure Machine Learning is tailored for data scientists. So I’m very excited to learn Azure Machine Learning in this “MVP Challenge-Azure Data & AI Challenge” journey. It’s very helpful!
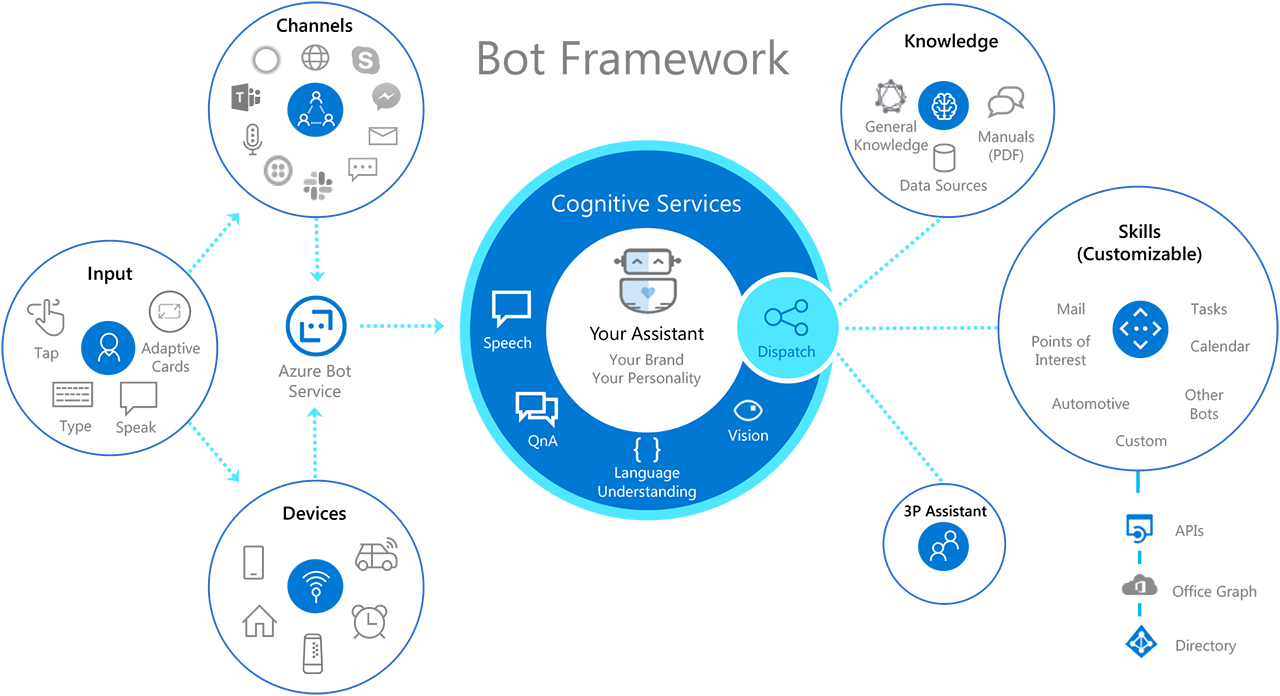
And Microsoft Bot Framework is really interesting as well. It’s a comprehensive framework for building enterprise-grade conversational AI experiences.
Now I will introduce how to build an image classifier for detecting viral pneumonia, bacterial pneumonia with Azure AI And Unity.
Why Detect Viral Pneumonia, Bacterial Pneumonia With AI?
The world has changed due to the COVID-19 pandemic in 2020. Medical staff around the world have shown bravery and resilience in the fight against COVID-19, and some even sacrificed their lives while performing their duties. As an ordinary person, as a programmer, I also want to help. Therefore, using AI to try to help diagnose lung diseases, such as viral pneumonia, bacterial pneumonia, is an idea that I am interested in trying.
I am an advocate of Azure and Unity, so my first thought was to use Azure and Unity to implement an image classifier that can be used for lung chest radiographs. In addition to the game industry, Unity can also play a role in other industries, so I think it is a very interesting idea to combine Azure and Unity to create some features that help people.
Azure Cognitive Servies
Azure is a cloud computing platform, it also provides AI services for developers. Azure Cognitive Services is a comprehensive family of AI services and cognitive APIs to help you build intelligent apps.
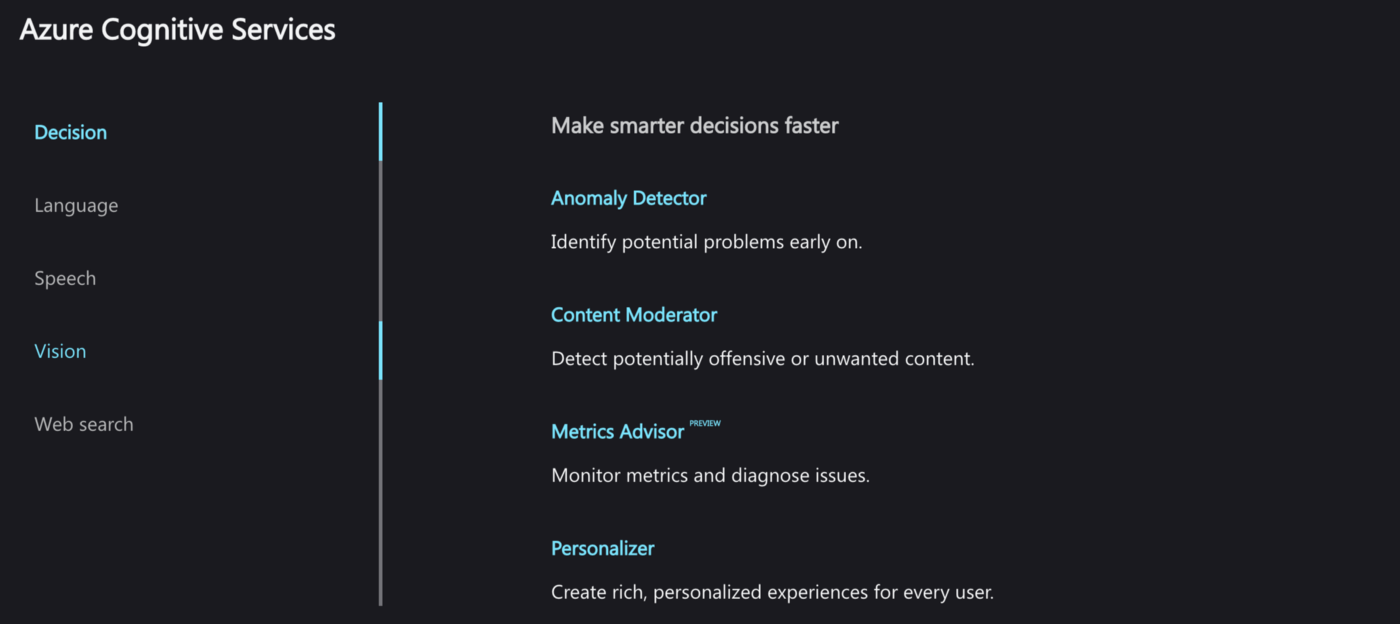
What we need is an AI Vision service. By using Vision services, we can identify and analyze content within images, videos, and digital ink. In order to train our own model, we can select the Custom Vision service of Vision services to customize image recognition to fit our needs.
Create A Custom Vision Project and Get The Dataset
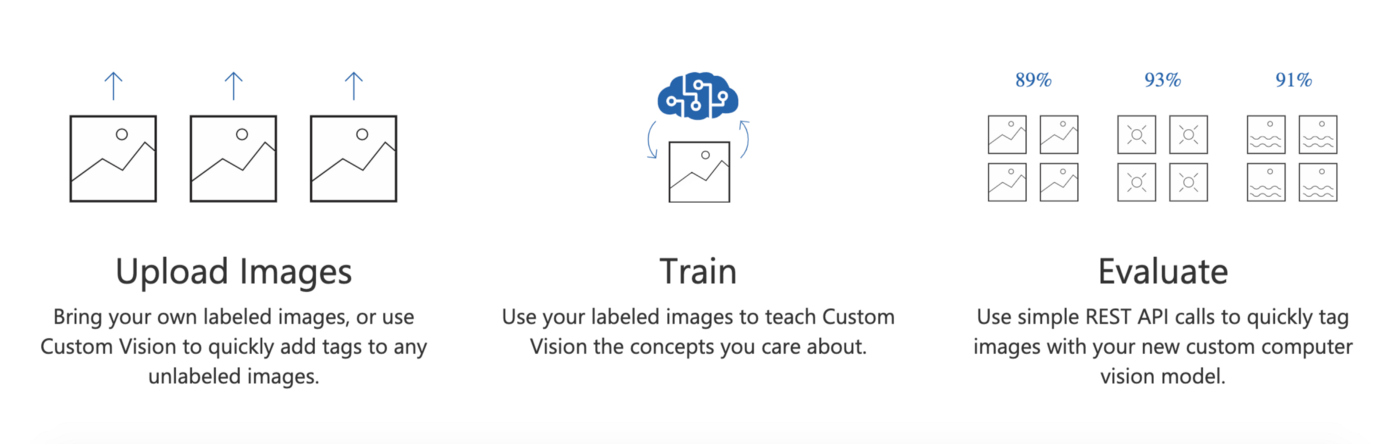
The Custom Vision service provided by Azure provides us a user-friendly interface to develop and deploy custom computer vision models. In the following image, You can find the process of creating a custom computer vision models that fit with our use case.

The first thing we need to do is to create a project on the Custom Vision site. We should identify the name of the project and create a new Azure Cognitive Services resource if there is no existing one. And there are two available options for Project Types, Classification and Object Detection. In our case, I select the Classification type.
The second thing is to look for a suitable dataset, the images to train our model later. In this case, I will use the dataset from Paul Mooney, you can find it here. There are 5,863 X-Ray images (JPEG) and 2 categories (Pneumonia/Normal) in the dataset.
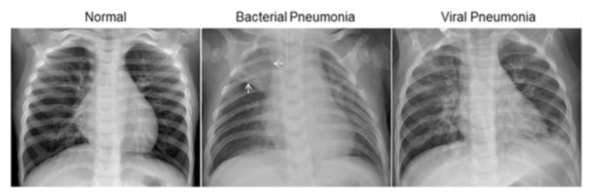
The normal chest X-ray (left panel) depicts clear lungs without any areas of abnormal opacification in the image. Bacterial pneumonia (middle) typically exhibits a focal lobar consolidation, in this case in the right upper lobe (white arrows), whereas viral pneumonia (right) manifests with a more diffuse ‘‘interstitial’’ pattern in both lungs.
Train The Model
It’s very easy to train our computer vision model on the site. The first thing is to choose suitable images and upload them to the project we created with a tag. In this case, I will use three tags to classify three groups of images, VIRUS PNEUMONIA, BACTERIA PNEUMONIA, and NORMAL respectively.
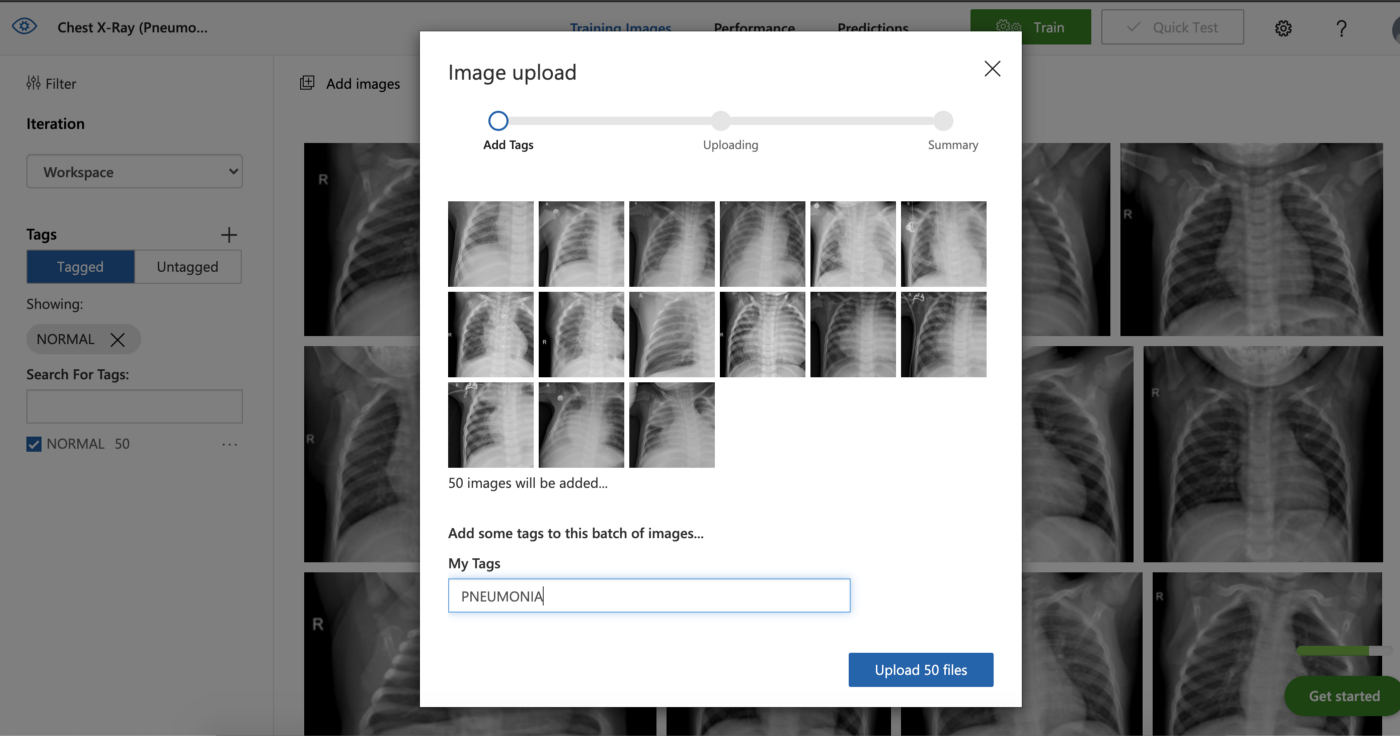
It is a good idea to choose an appropriate number of images, so I chose about 70 images for each tag for training.
Then click the Train button at the right-top of the site, a window will pop up for you to choose a training type.

I chose the Advanced Training type and the Training budget is 12 hours.
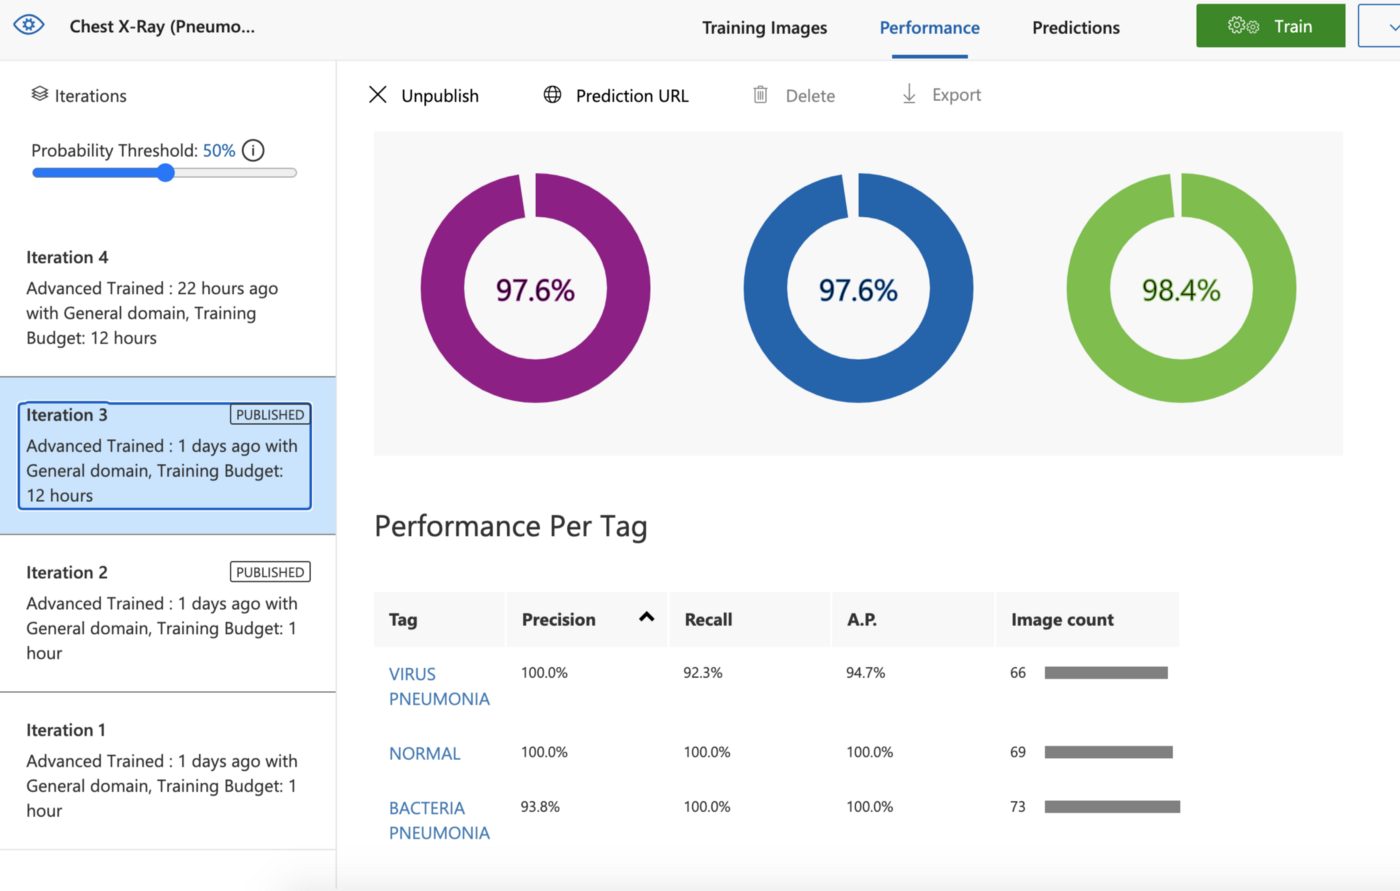
After the training is over, we can see the results on the Performance page. In order to test this model, we can quickly test it via the Quick Test function on the site.

Integrate Azure and Unity
Now we get a trained compute vision model and an API to classify the images based on the tags.
However, I want to integrate the functionality into Unity. Fortunately, Microsoft provides the Azure Custom Vision SDK in C# language. So I think it is possible to integrate them, even if I want to run it on Mac OS.
Since Unity 2018, we get a .net standard 2.0 compatibility level, which should be perfect for Nuget packages. Simply download the package using a separate VS project, then take the netstandard20 version of the DLL and place it in our Unity project. I made a .unitypackage file includes these required dlls, you can download it from here.
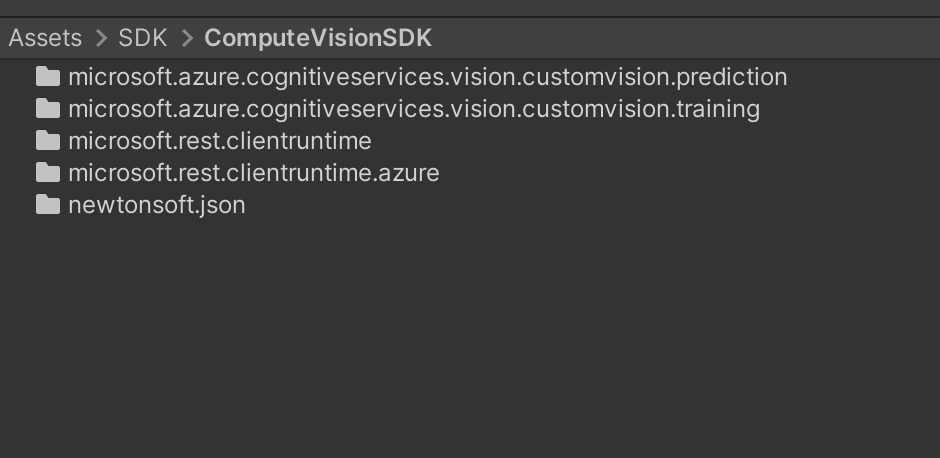
You can see the dlls we need in the project in the above image.
Then I will set up the C# code in our Unity project.
void Start()
{
    var ENDPOINT = Environment.GetEnvironmentVariable("CUSTOM\_VISION\_ENDPOINT");

    var predictionKey = Environment.GetEnvironmentVariable("CUSTOM\_VISION\_PREDICTION\_KEY");

    _prediction = new CustomVisionPredictionClient(new Microsoft.Azure.CognitiveServices.Vision.CustomVision.Prediction.ApiKeyServiceClientCredentials(predictionKey))
    {
        Endpoint = ENDPOINT
    };
}
Firstly, I set up the environment and create an instance of CustomVisionPredictionClient in the Start method in Unity. As you can see in the code above, we need the endpoint of the Custom Vision resource and the key of the same resource to set up the environment in Unity.
You can find them at the setting window of your Custom Vision project site. You can see it in the following image.
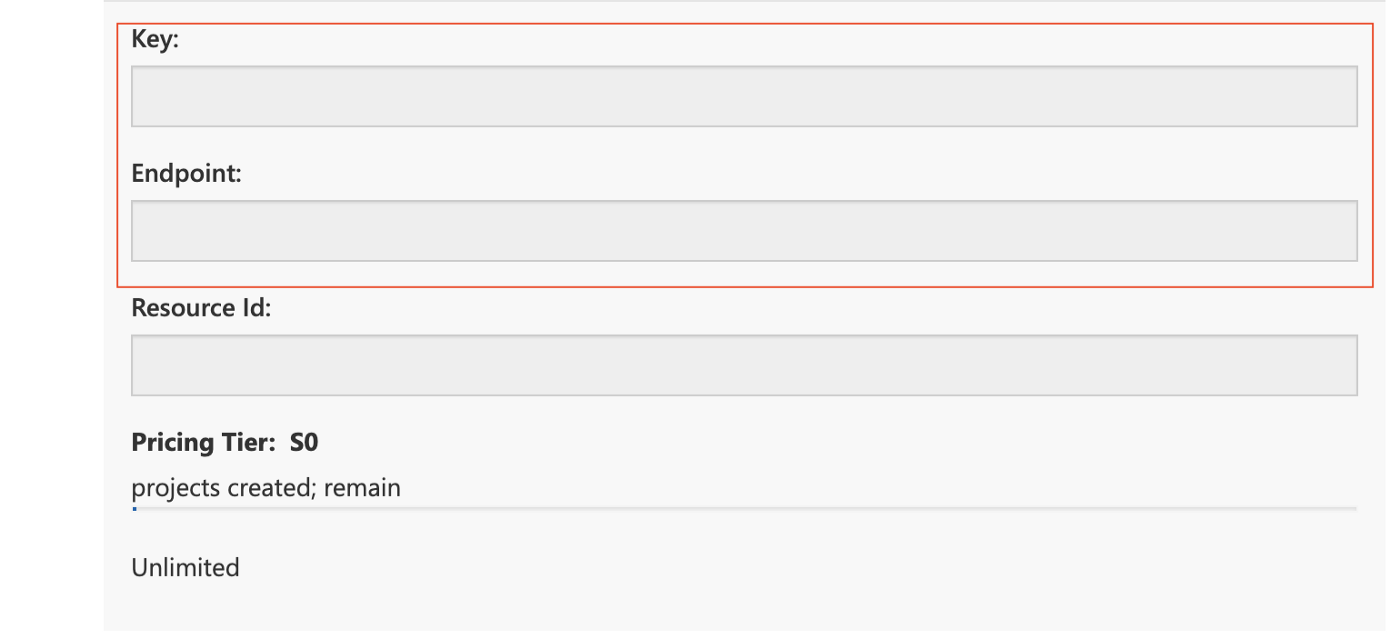
If you don’t set it up correctly, you will not connect to the correct Cognitive services resource.
Then we can call the ClassifyImage method of CustomVisionPredictionClient to classify the input image.
byte\[] bytes = sprite.texture.**EncodeToPNG**();
_testStream = new MemoryStream(bytes);

var publishedModelName = "Iteration2";
var result = _prediction.ClassifyImage(_project.Id, publishedModelName, _testStream);
You need to provide the id of the project, you can find it on your project site too, and the publishedModelName, the name of the model (Iteration) you are using. You can find this name on the performance page of your project website. The last parameter you need to provide is the data of the input image.
In order to convert a texture in Unity context to the required MemoryStream instance, we call the EncodeToPNG method of Texture to convert the texture into a byte array, then create the corresponding MemoryStream instance.
Finally, let’s add some chest x-ray images to test the functionality in Unity.
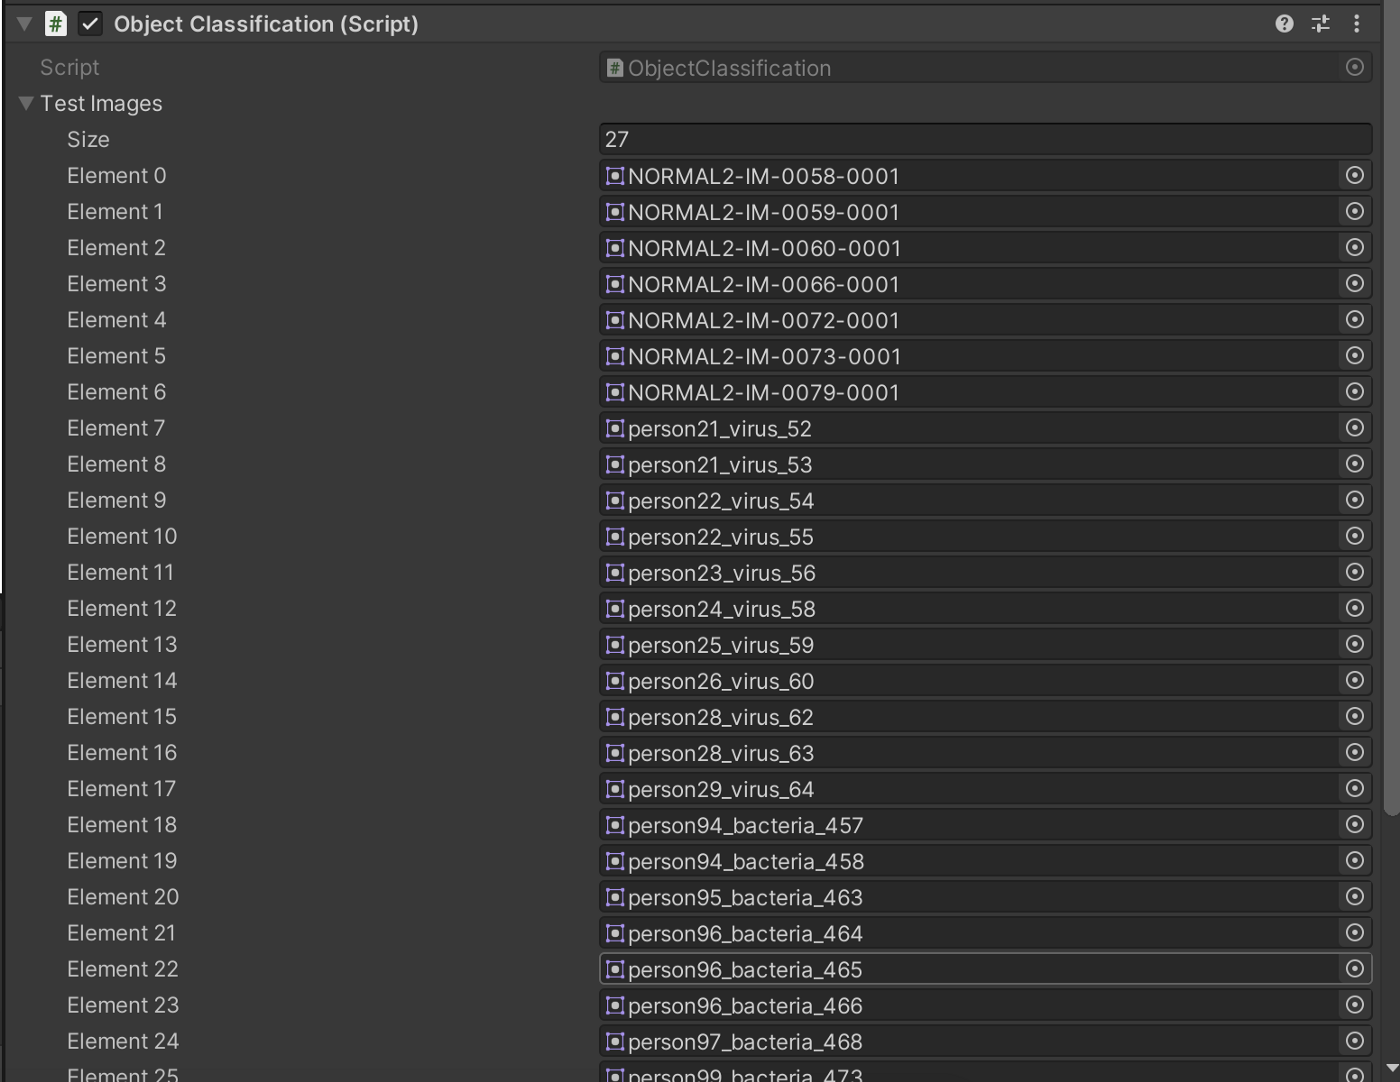
Then you can see in the video below, our Unity project can classify the chest x-ray images correctly now.
You can find the Unity Project repo here(doesn’t include the Azure part):
https://github.com/chenjd/Unity.DetectPneumoniaWithAzure
If you want to learn more about Azure Cognitive Service, I’ve created a collection for Azure Cognitive Service — Vision services so that you can also learn it to create your image classifier apps:
Thanks for reading and hope it’s helpful.
Have a chat at https://www.linkedin.com/in/chenjd/
Thanks for reading and hope it’s helpful.
Have a chat at